


2023-04-08 - AiM Display Setup
One of my favorite things about the AiM dashes and lap timers (Solo 2 DL version) is the ability to connect to the vehicle ECU to collect whatever information is available. This typically includes throttle position, engine RPM, gear selection, and sometimes, if you're really fortunate, IMU data, brake pressure, front & rear wheel speed, TC engagement, etc. Having these channels of data will oftentimes make it easier to find opportunities. A while ago I asked my riding coach to ride my bike to get some reference data. There was one spot on the track where he just lept ahead of me disproportionately. I dug into the ECU channels and found that he was able to get to significantly more throttle sooner and dramatically out-accelerate me while I was struggling to keep the front wheel on the ground. As it turned out, he short-shifted through a rapid series of turns whereas I was trying to use the engine in a higher RPM range in a lower gear but as a result, it was hard to control the bike. Having this additional ECU data made it possible for me to try to replicate his approach which otherwise would have left me bewildered.
Because track testing is limited, I try to come to the track as prepared as possible, and this includes finding the ECU profile that gathers the most and best information possible. One of the easiest ways to confirm this and prepare in advance is to add pages to the display of your AiM dash or data logger. This is done within the configuration profile for the device.
Step 1 - Build the configuration - in this example, I'm using a Solo 2 DL (S2DL)
Make sure you've got the appropriate ECU selected to start with. Mine is a custom profile that I commissioned by a protocol specialist.

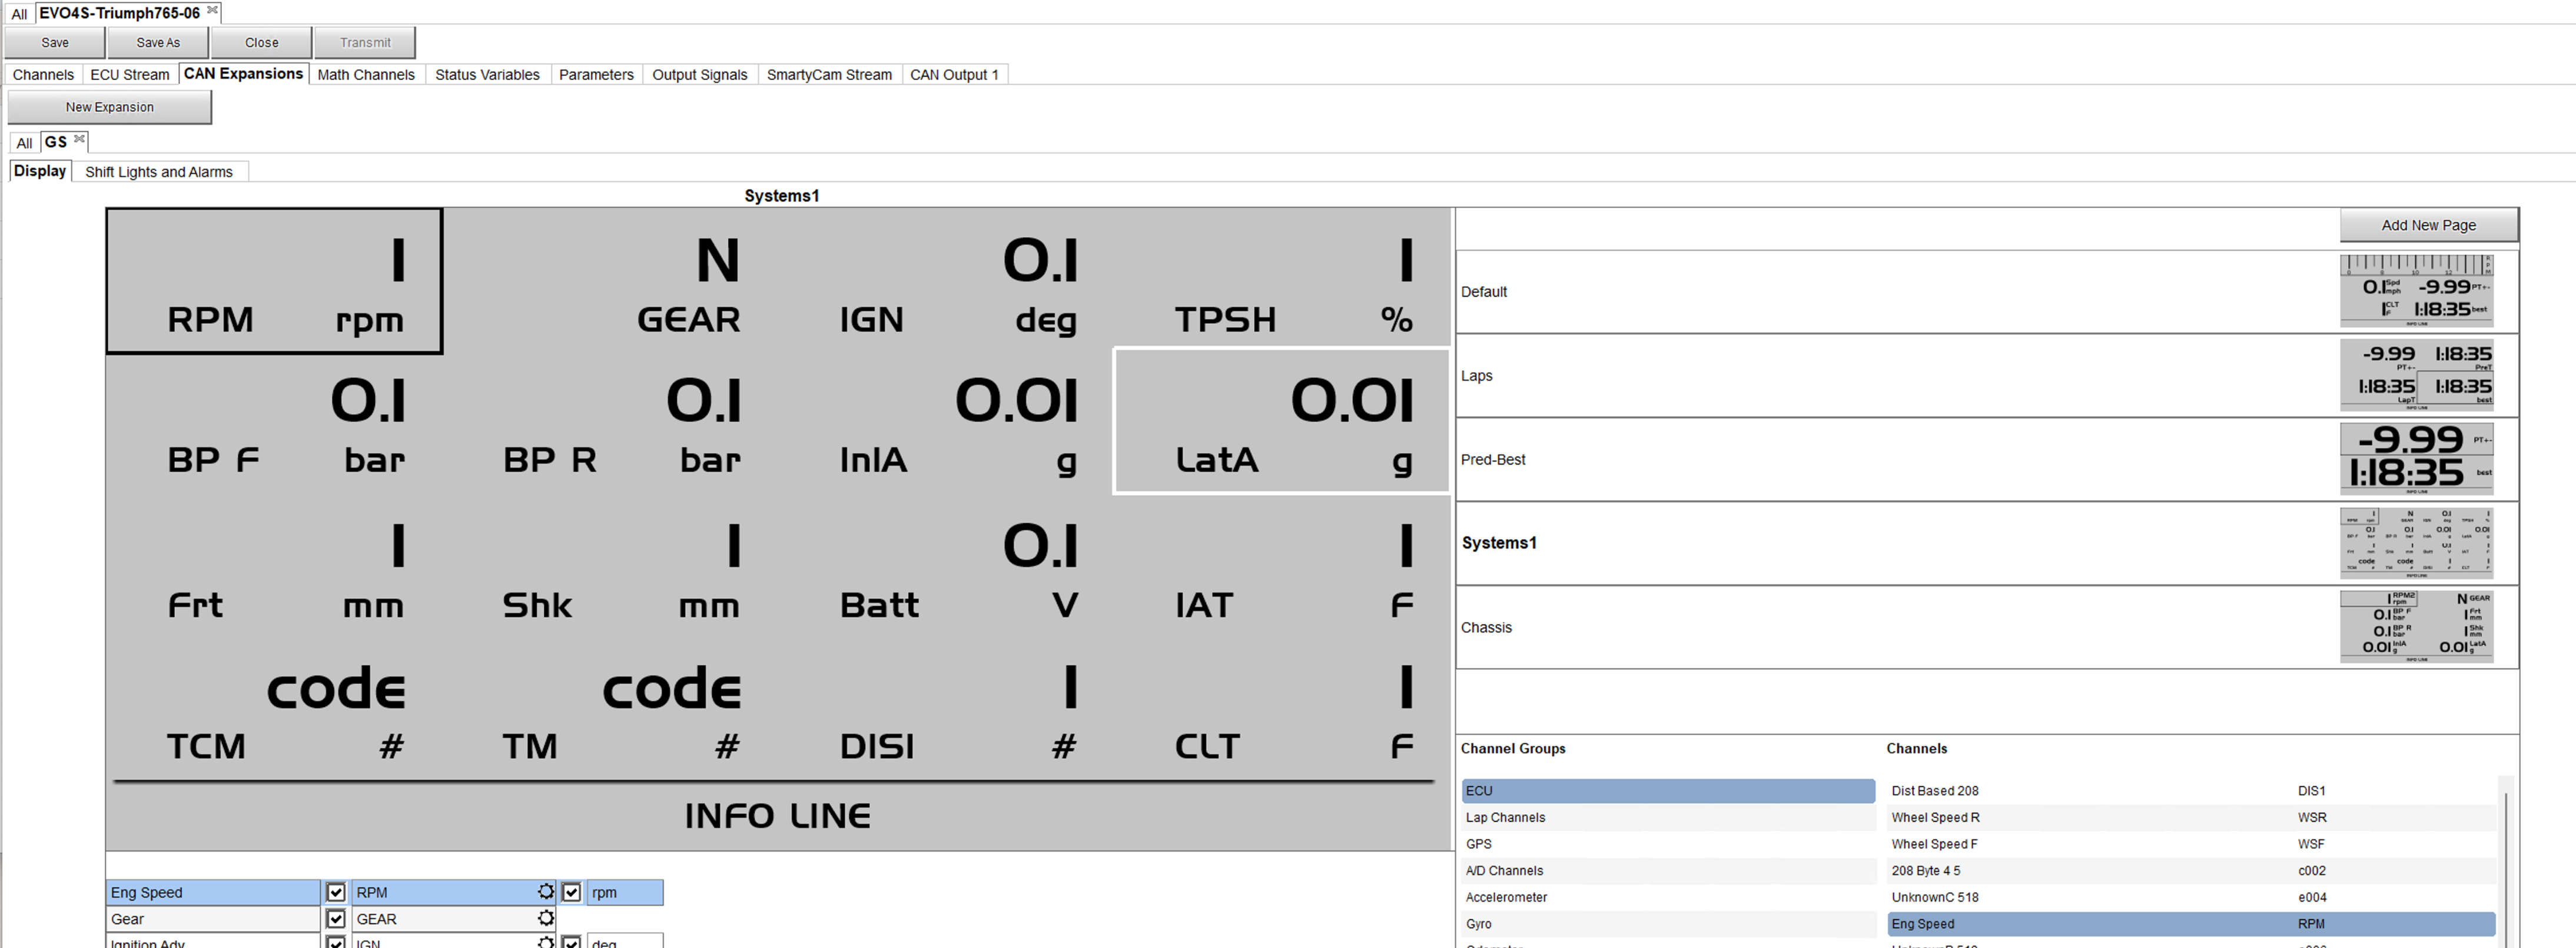
Step 2 - Configure the Display options
I have several pages, most of which I seldom review but I will the day before or the morning of a test. This allows me to confirm that I am connected to the vehicle's ECU with the correct profile. I normally set up a couple of pages at the beginning for lap data, because that's what will normally stay on during the testing. Your default is obviously up to you, this is what I like to see.


You can add several pages and in the above, I've added engine RPM, front brake pressure, throttle position, and gear selection.
On my other vehicle, I've integrated suspension potentiometers and brake pressure sensors, and being that it is a GS Dash connected to an EVO4s, it offers a detailed page layout where I have everything I want to confirm. This gives me one stop to check the data coming from the ECU stream as well as the analog sensors.
If you have a TFT dash/logger, the idea is the same and each product has its own layout options.
After you've built your configuration, save it (with a descriptive name and/or notes).
Step 3 - Transmit and Test
After you've named, described, and saved your data logger profile, connect to your device and transmit the configuration. Once it reboots, connect to it and check the more important measures. If you haven't configured the display as above, you can use your computer and read live measures. It's not as quick and easy as having dedicated display pages though. You may end up changing ECU profiles at some point but you can do that within the existing configuration or clone the one you want to test, then transmit again until you've found the setup that works best for you.
AiM has documented the vehicles for which they have data logger profiles here: https://www.aim-sportline.com/en/documentation-stock-ecu-connections.htm and changes to the ECU profiles here: https://www.aim-sportline.com/download/software/doc/ECUProtocolsUpdates.pdf You will want to periodically check to see if you vehicle ECU profile is updated. If it is, go back into your data logger configuration and re-select the vehicle, save it, and transmit it to your device in order to get additional data.
One last tip is that if you are connecting to different ECUs in short periods of time, you can also transmit more than one configuration to your device (this is usually an S2DL). I usually only do 2 or maybe 3, out of concern for leaving enough memory for data collection. If you have more than one configuration loaded into an S2DL at one time, go to the settings and you can change the selected configuration. Once you confirm, the S2DL will reboot. While connected to your device, click the checkboxes of the profiles you want to send and transmit.
